Why you might need a dental crown procedure
If you are dealing with a cracked, worn, or severely decayed tooth, your dentist may recommend a dental crown procedure to restore strength and appearance. A dental crown is a custom, tooth-shaped cap that fits over your existing tooth to protect it and help you chew comfortably again. Crowns are commonly used for teeth that are too damaged for a simple filling but still healthy enough to save, which helps you avoid an extraction in many cases.
You might be a candidate for a crown if you need to:
- Protect a weak tooth from breaking
- Restore a tooth that is already broken or severely worn
- Cover and protect a tooth after root canal therapy
- Support a dental bridge for missing tooth
- Improve the look of a discolored or misshapen tooth
Understanding what to expect from the dental crown procedure can help you feel more confident and prepared every step of the way.
How a dental crown compares to other tooth repairs
Before you commit to a dental crown, it helps to understand where it fits among other tooth restoration options. Your dentist will recommend the most conservative treatment that can still give you a strong, long-lasting result.
For smaller cavities or minor damage, tooth colored fillings are usually enough. A filling works well when most of the natural tooth structure is still intact and strong. If decay is more extensive but the tooth can still be rebuilt, an inlay or onlay might be considered.
However, when damage or decay is deeper or more widespread, you may need a crown instead of a filling. A crown is often recommended if:
- You have a large cavity that weakens the tooth, even after cavity treatment dentist care
- You are trying to restore broken tooth structure that has lost a lot of its surface
- You need treatment for cracked tooth that extends into the chewing surface
- You have severe tooth decay treatment needs that cannot be safely managed with fillings alone
In more complex cases involving many teeth, your dentist may discuss a full mouth reconstruction dentist plan that combines crowns with bridges, implants, and other restorations.
Step 1: Consultation and diagnosis
Every dental crown procedure starts with a careful evaluation. During this visit your dentist will:
- Ask about your symptoms, such as pain when chewing, sensitivity, or visible fractures
- Examine your teeth and gums
- Take dental X-rays or digital images to check the roots and surrounding bone
This assessment helps your dentist confirm whether a crown is the best choice and whether additional treatments, like a root canal, are needed first. For example, if the tooth is severely infected or the nerve is compromised, a root canal may be recommended before the crown is placed to protect the tooth and relieve pain. You can learn more about early warning signs in resources like signs you need a root canal.
At this stage you will also discuss:
- The material options for your crown
- How many appointments you are likely to need
- Cost estimates and insurance coverage
- Any concerns you have about comfort or time off work
Step 2: Choosing your crown material
Choosing the right crown material affects appearance, strength, and longevity. Your dentist will help you match the material to the tooth location, your bite, and your cosmetic goals. Research highlights several common types:
| Crown type | Key advantages | Typical uses |
|---|---|---|
| All metal (gold or alloys) | Extremely durable, minimal tooth removal needed, rarely chip or break | Back molars where appearance is less critical |
| Porcelain-fused-to-metal (PFM) | Strong metal core, tooth-colored outer porcelain, good balance of strength and aesthetics | Front and back teeth, especially premolars and molars |
| All-ceramic or all-porcelain | Excellent cosmetic result, mimics natural translucency, metal-free | Front teeth or highly visible areas |
| Zirconia | Very strong ceramic, tooth-colored, good biocompatibility, excellent survival rates | Front and back teeth, especially when you want both strength and appearance |
| Resin | More affordable, tooth-colored | Often used as temporary solutions, not as durable long term |
Metal crowns usually last the longest, often 20 years or more for gold, while zirconia and PFM crowns commonly last 10 to 15 years with good care. All-ceramic crowns deliver great aesthetics, especially in the front, but may have slightly shorter lifespans.
Your dentist will explain which material can best support your bite forces, match nearby teeth, and meet your comfort and budget preferences.
Step 3: Tooth preparation and decay removal
Once you and your dentist decide to move forward, the active part of the dental crown procedure begins. Tooth preparation is a detailed process designed to remove disease and shape the tooth so your new crown will fit securely.
First, your dentist numbs the area with local anesthesia so you remain comfortable throughout treatment. Then any decay or old filling material is removed, and the tooth is reshaped to create a stable base for the crown. The amount of enamel removed depends on the type of crown. All metal crowns are very thin and require minimal reduction, while porcelain or PFM crowns may need a bit more space to fit properly.
If there is extensive damage, your dentist may place a build-up material to reinforce the tooth before shaping. In some situations, a root canal is completed before this step so that the crown can protect the treated tooth and restore chewing function.
Throughout the preparation you can expect your dentist to check your bite and make sure there is enough room for the future crown without interfering with adjacent teeth. This is a key step in long-term damaged tooth repair.
Step 4: Impressions and digital scans
After your tooth is shaped, your dentist will capture an exact model of it along with neighboring teeth. This model guides the laboratory, or an in-office milling machine, in creating a crown that fits precisely.
Traditional impression materials like alginate or more detailed polyvinyl siloxane may be used, or your dentist may use a digital scanner to create a 3D image of your teeth. Digital methods often improve comfort for patients who dislike impression trays.
This step usually takes only a few minutes, but it is essential for achieving a crown that:
- Fits snugly at the gumline
- Aligns correctly with opposing teeth
- Restores proper bite and chewing function
Once the impressions or scans are complete, they are sent to a dental laboratory or processed in-office, depending on whether you are getting a traditional or same-day crown.
Step 5: Getting a temporary crown
If you are receiving a traditional crown, you will leave your first appointment with a temporary crown to protect the prepared tooth. This temporary restoration is typically made of acrylic or resin and is designed to:
- Shield the tooth from sensitivity and fracture
- Maintain your appearance while you wait for the permanent crown
- Keep nearby teeth from shifting into the space
Your dentist will use temporary cement so the crown can be easily removed later. You will be given instructions on how to care for it, such as avoiding sticky or very hard foods on that side and being cautious when flossing so you do not pull the temporary crown loose.
The permanent crown is usually fabricated in a dental lab within 1 to 2 weeks using porcelain, ceramic, metal, or a combination, with attention to both strength and natural appearance.
Step 6: Traditional vs same-day crown timing
The length of your dental crown procedure depends partly on the type of crown you receive.
For a traditional crown:
- You typically need two visits
- The first visit includes tooth preparation, impressions, and placement of the temporary crown
- The second visit, usually 1 to 2 weeks later, is for trying in and cementing the permanent crown
For a same-day crown:
- CAD/CAM technology is used to design and mill a custom ceramic crown in the office
- Digital impressions are taken, the crown is created on-site, and it can be placed in a single visit
- The entire appointment often takes around 60 minutes of active time, depending on the case
Most patients spend a total of 2 to 3 hours in the dental chair for the full process, whether this is spread over two appointments or condensed into one, depending on technology and complexity. Not all teeth are suitable for same-day crowns, especially if more advanced lab work is needed, so your dentist will let you know which option fits your situation best.
Factors that can extend the overall timeline include:
- The need for prior root canal therapy
- Gum treatments or other work on surrounding teeth
- Complex bite issues that require more adjustment
- Choice of more detailed cosmetic materials like layered porcelain
Step 7: Fitting and cementing your permanent crown
When your permanent crown is ready, you return for your second visit if you are having a traditional crown, or you continue the same-day process. Your dentist will remove the temporary crown if present, clean the tooth, and then try in the new crown.
During this appointment your dentist will check:
- The fit of the crown on the prepared tooth
- The contact with neighboring teeth
- Your bite when you close and chew
- The color match with surrounding teeth
Minor adjustments can be made to the crown to improve comfort and function. Once everything looks and feels right, your dentist will cement or bond the crown into place using a strong dental adhesive. Any excess cement is removed and the bite is checked again to ensure there are no high spots that could cause soreness later.
At this point your tooth is fully restored and ready to function like a natural tooth.
How your tooth should feel after a crown
It is normal to have some sensitivity or mild discomfort after a dental crown procedure, especially as the numbness wears off. You may notice:
- Sensitivity to hot and cold
- Tenderness when biting down
- Mild gum soreness around the crowned tooth
These sensations usually fade within a few days to a couple of weeks, and over-the-counter pain relievers are often enough to keep you comfortable. Avoiding very hot or cold foods briefly can help reduce sensitivity during the adjustment period.
You should contact your dentist promptly if you experience:
- Severe or throbbing pain that does not improve after a few days
- A crown that feels very high or painful when you bite
- A loose or fallen crown
- Visible chips or cracks in the crown surface
These can be signs that the crown needs adjustment or repair and should not be ignored.
Longevity and everyday care of your crown
With proper care your dental crown can last many years. Many crowns last between 5 and 15 years or even longer depending on the material, your bite, and your habits. Gold crowns often last 20 years or more, while zirconia and PFM crowns routinely reach 10 to 15 years with good maintenance.
To protect both your new crown and the surrounding teeth you should:
- Brush twice daily with fluoride toothpaste
- Floss around the crown each day to prevent gum disease at the margins
- Avoid chewing ice, hard candies, or opening packages with your teeth
- Address teeth grinding with a custom night guard if needed
- Limit very sticky foods that could stress or loosen the crown
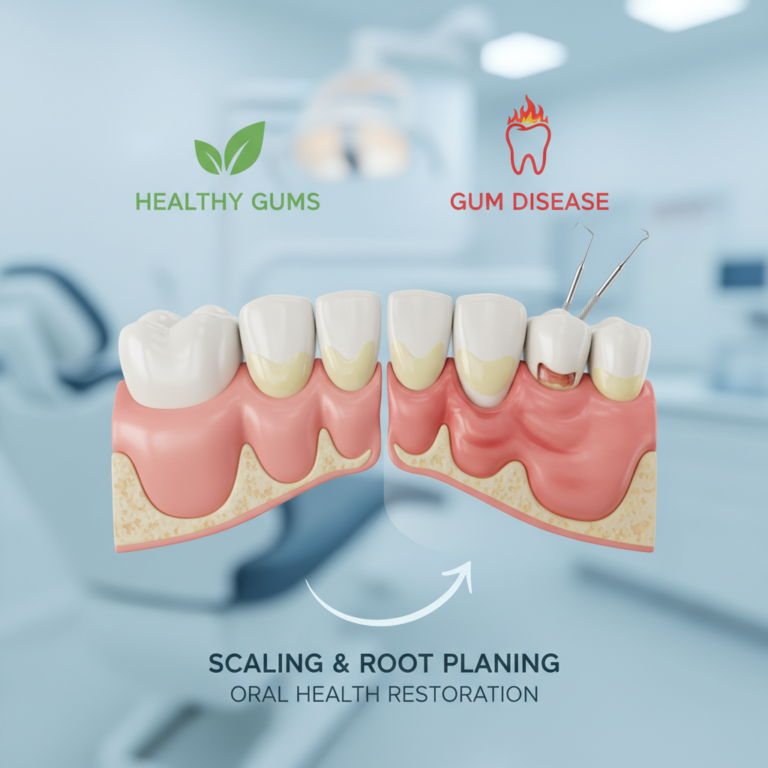
Regular dental checkups allow your dentist to monitor the crown and catch small issues early, before they turn into more serious problems. Maintaining healthy gums around the crown is especially important, since gum disease can undermine even the strongest restoration.
Addressing multiple or severely damaged teeth
If you have more than one compromised tooth, your dentist may incorporate crowns into a broader treatment plan. Crowns often work alongside:
- Dental bridge for missing tooth solutions to fill spaces
- Severe tooth decay treatment for teeth that can still be saved
- Full mouth reconstruction dentist plans when many teeth are worn, fractured, or missing
In these cases, the dental crown procedure becomes part of a step-by-step approach to rebuild both function and appearance. Treating issues early usually means simpler, less invasive procedures and a better chance of keeping your natural teeth.
If you are experiencing pain, visible fractures, or difficulty chewing, exploring damaged tooth repair options with your dentist can help you decide whether a crown, filling, bridge, or another restoration is the right next step.
By understanding what to expect during your dental crown procedure, from the first consultation to long-term care, you put yourself in a better position to protect your oral health and restore comfortable, confident chewing.